How to create a real estate listing map for your website
- Nan Zhou
- Apr 3, 2025
- 3 min read


For all real estate website, a listing map can significantly boost user experience. It allows potential buyers to quickly see where properties are located. Instead of reading through long descriptions, users can visually explore neighborhoods and check out nearby amenities. For example, a user searching for homes in Denver can zoom in on an area, view schools, parks, and public transport options, and easily find houses for sale near their preferred spots.
With the map filter options, users can narrow down their searches by specific locations. Statistics show that websites with interactive features retain 30% more visitors and encourage them to explore other listings. This increased engagement leads to higher visitor satisfaction and encourages longer browsing sessions.
In this guide, we will show you how to create a Zillow-like real estate listing map with your Google Sheets, including automatic data sync so all future updates are automatically synced.
How to build an interactive real estate listing map with Google Sheets
Create a No Code Map App account
Create a new map and choose the Real Estate template for your use case.
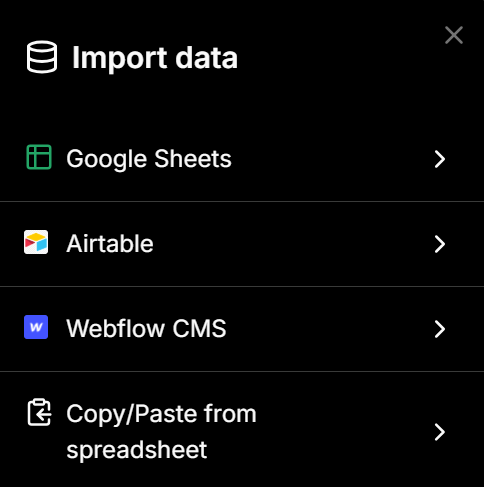
Under "Import Data", select Google Sheets.
Enter your Google Sheets URL, and set up automatic data sync
Select the data fields you want to import, and click on "Map My Data"
Customise the map to match your branding
How it works?
Step 1 - Create an account at https://www.nocodemapapp.com/
Step 2 - Create a new map and choose the Real Estate template

Step 3-5 - Sync data from Google Sheets
Click on "Import data" and select the Google Sheets option.
Enter your Google Sheets public link URL.
Select your auto data sync frequency (monthly, weekly or daily etc)
Select the data columns you want to import (up to 50 columns)
Click on the "Map My Data" button and a map will be generated for you in a few minutes depending on your data size


Step 6 - Customise your map
You can customise it further to match your branding and style preferences. You can customise everything from list view, to map filters, to map markers, popup box and more.


For example, in this real estate listing map, we used several interesting customisations:
Under "List view", we used 2-column listing view which is similar to Zillow's listing map
Under "Image / Audio / Video", embed image to each location
Under "Map markers", we used photo and price as map markers.
Under "Calls-to-action", we added a call-to-action button - "See details" which opens up to the individual listing page
Multiple map filters (e.g. beds, baths, price, size etc) which were all auto-generated based on the data.


Other tips
How to update data
If you don't want to use the auto data sync feature, you can also manually sync.
Go to "Reselect data", and
Click on "Sync the latest data".
How to change file link
If you want to change the Google Sheets file link, simply click on the "Remove sync" button then you will be able to add in a new file URL.


Comments