How to create a custom Restaurant Search map for your website?
- Nan Zhou
- Feb 14, 2022
- 2 min read

Updated: Apr 5, 2025
Before I go into detail on how to create a restaurant search map, let's do a quick refresher on our map builder!
This is the No Code Map App 3 step builder - super intuitive and easy to pick up.

Build an on-brand, interactive restaurant search map for your website
Step 1 - Select the "Restaurant" template

Step 2 - Import your data.
1. Select your data source
There are a number of ways you can import your data:
Copy/paste from spreadsheet
Sync with Google Sheets
Sync with Airtable
Sync with Webflow CMS
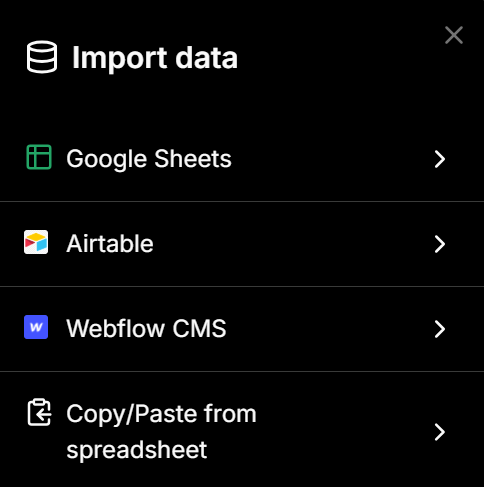
Click on "Copy/paste from spreadsheet" and you will see a window pop up where you can paste in your data. In order to help you prepare your Excel data, we have included an "example.csv" so you will know exactly how to set up your dataset.

Or you can sync with your Google Sheets, Webflow CMS or Airtable.


In the your data, you can include standard information as well custom fields like:
Name
Address
Description
Phone
Website
Cuisine type
Rating
Price
Service options
Reservation required
Call to action links
Image links
2. Select data fields

You can import up to 50 columns of custom data (whatever you want - just make sure you have column headers).
It can self-detect information-based columns (e.g. address, phone etc) vs filterable data (e.g. Theme, Date etc)
You can also include call-to-action and image link columns and auto-generate call-to-action buttons and bulk import images
Once you have imported your data, the No Code Map App smart builder will:
Automatically map your data based on your "location" or "address" column;
Automatically create custom map filters based on your dataset (yes, you read it right, any text filter be it single or multi-value filters. Later on we will also allow number filters);
Locations details will be added under each location.
Step 3 Customize your interactive map!
Now you can bring in your own style/branding! You can customize everything from fonts, colors, to what shows in each location detail box.

You can customise with clicks or text prompts - watch this demo.


Comments